
Google Adwords Enhanced Conversions provide more data to Google that help drive their algorithms to better optimize when and how your product listings and campaigns are shown to potential customers.
Below are instructions on the Enhanced Conversion script that is run after the checkout has been completed.
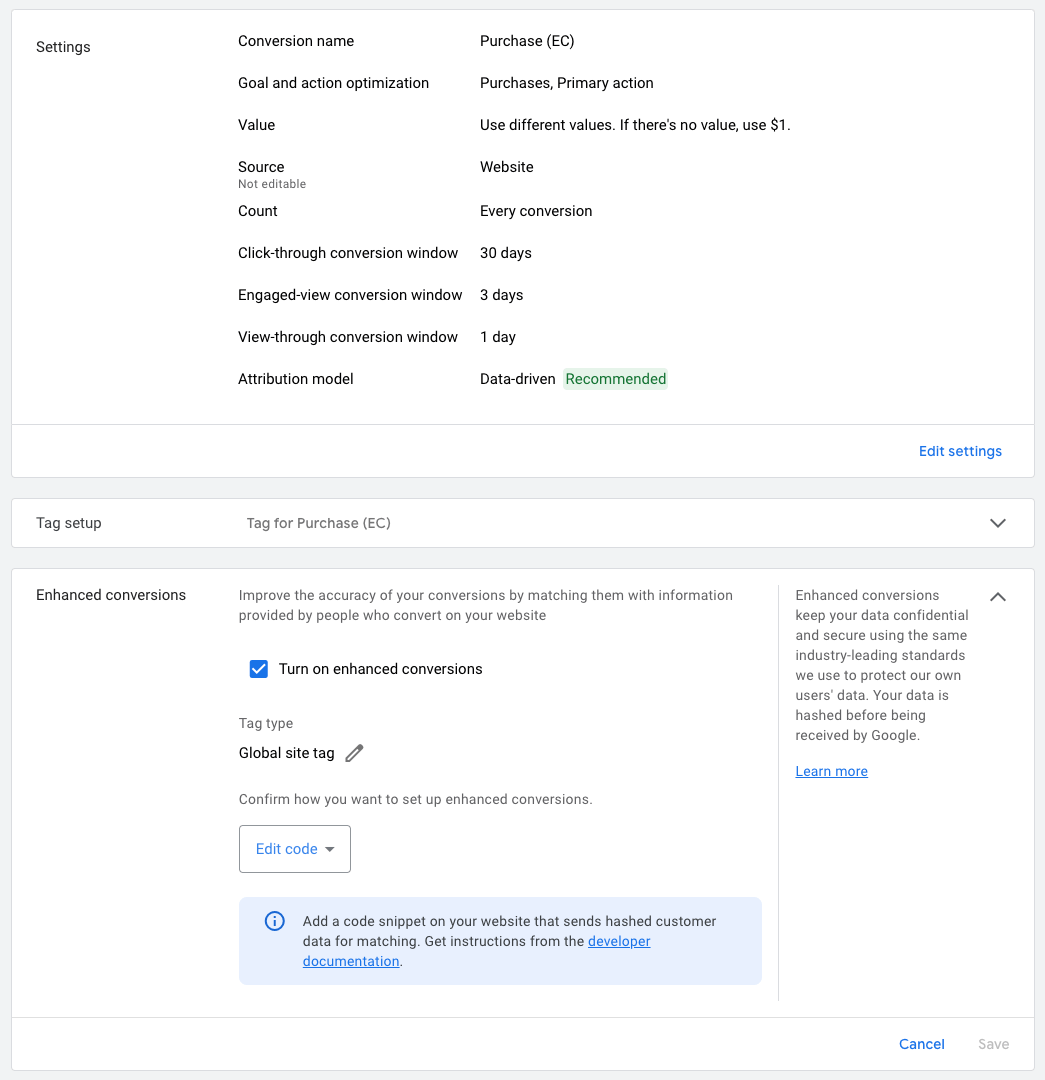
Create a new Conversion in your Google Adwords account with Enhanced Conversions turned on
The below image outlines how you want to setup a Coversion with Enhanced Conversions tracking.
You'll want to make sure you add the tracking via Global site tag which will allow you implement the tag on the back-end instead of Google Tag Manager which can be blocked with Ad-Blockers.
Download Google Tag Assistant Chrome browser extension
To help confirm that your tags are properly setup and verify the conversion labels are correct download Google Chrome extension Tag Assistant Legacy (by Google). You will use it to verify you have the correct tags firing on the correct pages.
Shopify Config for Google Enhanced Conversions
- Setup a conversion in your AdWords account
- Verify that you have the correct conversion label
- Verify that you have the correct Google Ads account number
- Go to Shopify Admin > Settings > Checkout
- Paste the below code in the
Order status pagesection. (Make sure to replaceACCOUNT_ID_HEREandCONVERSION_LABEL_HEREwith your Google Adwords account and conversion label.)
<script>
var enhanced_conversion_data = {
    "first_name": "{{ checkout.billing_address.first_name }}",
    "last_name": "{{ checkout.billing_address.last_name }}",
    "home_address": {
      "street": "{{ checkout.billing_address.street }}",
      "city": "{{ checkout.billing_address.city }}",
      "region": "{{ checkout.billing_address.province }}",
      "postal_code": "{{ checkout.billing_address.zip }}",
      "country": "{{ checkout.billing_address.country_code }}"
    }
  }
  if("{{ checkout.email }}"){
    enhanced_conversion_data.email = "{{ checkout.email }}";
  }
  if("{{ checkout.billing_address.phone }}"){
    enhanced_conversion_data.phone_number = "{{ checkout.billing_address.phone }}";
  }
</script>

// Global site tag (gtag.js) - Google Ads: ACCOUNT_ID_HERE
<script async src="https://www.googletagmanager.com/gtag/js?id=AW-ACCOUNT_ID_HERE"></script>
<script>
  window.dataLayer = window.dataLayer || [];
  function gtag(){dataLayer.push(arguments);}
  gtag('js', new Date());

  gtag('config', 'AW-ACCOUNT_ID_HERE', {'allow_enhanced_conversions': true});
</script>

{% if first_time_accessed %}
  <script>
    gtag('event', 'conversion', {
      // add your account ID and Conversion label here
      'send_to': 'AW-ACCOUNT_ID_HERE/CONVERSION_LABEL_HERE',
      'value': {{ checkout.total_price | divided_by: 100.0 }},
      'currency': '{{ currency }}',
      'transaction_id': '{{ order_number }}',
    });
  </script>
{% endif %}
See also the Google Support developer documentation